To Add Recessed Lighting To A Finished Ceiling / Vaulted ceiling lighting ideas - creative lighting solutions : Recessed lights, also known as can lights, are described as metal light housings installed in the ceiling for a sleek look that gives you back your ceiling.
Dapatkan link
Facebook
X
Pinterest
Email
Aplikasi Lainnya
To Add Recessed Lighting To A Finished Ceiling / Vaulted ceiling lighting ideas - creative lighting solutions : Recessed lights, also known as can lights, are described as metal light housings installed in the ceiling for a sleek look that gives you back your ceiling.. This video shows how to install recessed lights / recessed lighting installation. Using a screwdriver, push the clips outward until a click is felt to securely clamp the housing to the ceiling. Remodel housing is designed to allow for installation in an existing ceiling.; It sits above the ceiling and holds the trim and light bulb. When it comes to spacing recessed lighting apart, industry standard is to divide the ceiling height in half and then use that number as your spacing guide.
Do this before cutting the holes for your pot lights, downlight, or can lights (ca. Most recessed lighting kits come with the fixture box affixed to the light, which makes hanging the fixture easier. You can get led can lights that are completely flush with the ceiling as well. If you are adding 3/4 or so to the ceiling then you should be fine. Pull the clips in so they do not protrude outside the can.
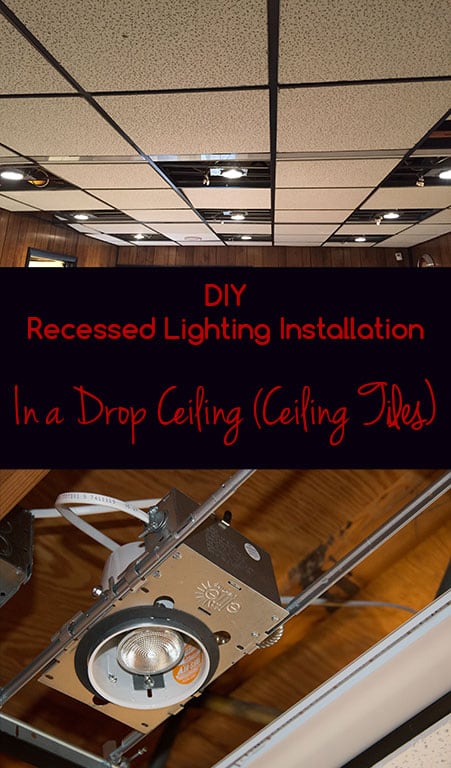
DIY Recessed Lighting Installation in a Drop Ceiling ... from supernovaadventures.com If you were to follow this, then lights for an 8 foot ceiling would be spaced 4 feet apart. Trace the circle onto the ceiling in every location where you will be installing a light. It has that modern sleek design which is preferred nowadays. They have adjustable support racks so the width is adjustable. Slip the can's box into the hole, and then push the can body up into the hole until its flange is tight to the ceiling. For more lighting tips see our lighting and ceiling. A recessed light assembly consists of the housing (photos 8 and 9), trim (photo 12) and lamp. A recessed light, sometimes called a can light, has both its housing and bulb recessed above the ceiling drywall.
2) once you have settled on the location of your lights, remove the paper template from the recessed can packaging.
Follow the instructions included with your recessed light for exact installation procedures. Mark the spot on the ceiling where the recessed lighting fixture is to be installed. I do have a pretty lamp on my counter. Using a screwdriver, push the clips outward until a click is felt to securely clamp the housing to the ceiling. Carefully insert the housing in the prepared hole and locate the clips along the edge of the housing. Google lithonia led wafer light as an example. Insert the remodel recessed light housing up into the ceiling until the tabs on the side click or snap in place to hold it up. If you were to follow this, then lights for an 8 foot ceiling would be spaced 4 feet apart. Oh, and don't forget the bathroom! You can get led can lights that are completely flush with the ceiling as well. A recessed light, sometimes called a can light, has both its housing and bulb recessed above the ceiling drywall. Remove the old lighting and install recessed lights inside the raised soffit ceiling. When installing recessed lighting in an existing ceiling, a hole is cut in the ceiling that exactly fits the profile of a special remodeling can to keep from damaging the surrounding drywall.
Carefully insert the housing in the prepared hole and locate the clips along the edge of the housing. Follow the instructions included with your recessed light for exact installation procedures. Then paint the ceiling and finally install the recessed light trim and lamps (photo 12). One advantage of the led recessed lighting for me is that i no longer have to use a ladder to take down and wash light fixtures which creates a fall hazard as i age in place. Most models of recessed light housing have four clips that clamp the can to the ceiling by pushing down on top of the drywall.
Remodelaholic | How to Install Recessed Lights Without ... from i2.wp.com If you were to follow this, then lights for an 8 foot ceiling would be spaced 4 feet apart. They have adjustable support racks so the width is adjustable. The new ones don't create a dark hole in the ceiling when the lights are off: With vaulted ceilings, installing recessed lighting can become even worse, with many fixtures starting at $200. Locate the ceiling joists on either side of the desired locations for each of the recessed lights using a stud finder. Oh, and don't forget the bathroom! The housing is the actual light fixture. When it comes to spacing recessed lighting apart, industry standard is to divide the ceiling height in half and then use that number as your spacing guide.
Slip the can's box into the hole, and then push the can body up into the hole until its flange is tight to the ceiling.
Cost to install recessed lighting in existing ceiling most current installs in existing ceilings cost $200 to $300 per fixture using canless led recessed lights. The new ones don't create a dark hole in the ceiling when the lights are off: We like plenty of light, so we chose 6″ lights and will install a dimmer switch so we can reduce the amount of light as needed. Google lithonia led wafer light as an example. I've had some questions about 4″ vs 6″ lights, which i answered in this vlog here (where you can also see the lights installed with the finished ceiling drywall). With vaulted ceilings, installing recessed lighting can become even worse, with many fixtures starting at $200. Depending on the size of the soffit in relation to your kitchen, you may want to add additional task lights around the soffit above the counter tops. Installing recessed lights into a finished textured ceiling. Follow the instructions included with your recessed light for exact installation procedures. A step by step walk through of how to install an additional recessed can light in your ceiling without having to cut it open to run wire. To install pot lights or recessed lighting you need to locate your beams. Each recessed light you install comes with the appropriate junction box. One can set lighting according to the mood of the individual which ensures that it has dimming capability.
However, in order to daisy chain them to an existing set of lights (same wall dimmer switch), i'll need to run wires. If you were to follow this, then lights for an 8 foot ceiling would be spaced 4 feet apart. I've had some questions about 4″ vs 6″ lights, which i answered in this vlog here (where you can also see the lights installed with the finished ceiling drywall). Add extensions as you go, to extend your reach. A recessed light, sometimes called a can light, has both its housing and bulb recessed above the ceiling drywall.
Installing Recessed Lights In A Finished Ceiling Most ... from tonetastic.info Mark the spot on the ceiling where the recessed lighting fixture is to be installed. Recessed lights, also known as can lights, are described as metal light housings installed in the ceiling for a sleek look that gives you back your ceiling. However, what is different from the diagram is that i have a 2 way cable in the switch box that leads to all the outlets in the room, so it will need constant. If you are adding 3/4 or so to the ceiling then you should be fine. One advantage of the led recessed lighting for me is that i no longer have to use a ladder to take down and wash light fixtures which creates a fall hazard as i age in place. One can set lighting according to the mood of the individual which ensures that it has dimming capability. Depending on the size of the soffit in relation to your kitchen, you may want to add additional task lights around the soffit above the counter tops. If you were to follow this, then lights for an 8 foot ceiling would be spaced 4 feet apart.
Most recessed lighting kits come with the fixture box affixed to the light, which makes hanging the fixture easier.
Once all clips are deployed, gently tug on the housing to make sure it is firmly attached to the ceiling. Using a screwdriver, push the clips outward until a click is felt to securely clamp the housing to the ceiling. The new ones don't create a dark hole in the ceiling when the lights are off: To install pot lights or recessed lighting you need to locate your beams. Parmida recessed retrofit ceiling lights. Cutting holes and pulling wire thru parallel joists should be fine. Adding crown moulding inside the soffit is a great way to give it a finished look. Then paint the ceiling and finally install the recessed light trim and lamps (photo 12). If you were to follow this, then lights for an 8 foot ceiling would be spaced 4 feet apart. Cost to install recessed lighting in existing ceiling most current installs in existing ceilings cost $200 to $300 per fixture using canless led recessed lights. One can set lighting according to the mood of the individual which ensures that it has dimming capability. But like florida said, i would be inclined to ditch the old fixtures and use the new led recessed that look like a regular can, albeit with a flat shower trim on it. I've had some questions about 4″ vs 6″ lights, which i answered in this vlog here (where you can also see the lights installed with the finished ceiling drywall).
5 Zone Gel Mattress Topper / Premium Gel Koudschuim Matrastopper 90x220 Cm 6 Cm Hoogte Sg 50 Oeko Tex Standard 100 Topmatras : 5 zone gel mattress topper. . 5 zone gel mattress topper. Check spelling or type a new query. We did not find results for: Maybe you would like to learn more about one of these? We did not find results for: Check spelling or type a new query. 5 zone gel mattress topper. Maybe you would like to learn more about one of these? Premium Gel Koudschuim Matrastopper 90x220 Cm 6 Cm Hoogte Sg 50 Oeko Tex Standard 100 Topmatras from Check spelling or type a new query. We did not find results for: 5 zone gel mattress topper. Maybe you would like to learn more about one of these? We did not find results for: 5 zone gel mattress topper. Check spelling or type a new query. We did not find results for: Maybe you wo...
Jura Coffee Machines Reviews E8400 Vs Q8200 Vs Q6600 Passmark : Cpu Benchmarks Compare Products On Anandtech / This processor is a favourite of gamers, designers and animators thanks to its efficiency, power and performance. . 4.6 out of 5 stars. Intel® product specifications, features and compatibility quick reference guide and code name decoder. The graphs show user score (x) vs user score frequency (y). At launch, amd's ryzen 5000 processors represented a watershed moment: Simple, if your not oc'ing q6600, if your oc'ing then the e8400, my old e8400 would oc to 3.8 ghz with little effort, a little. Base clock 3.6 ghz, turbo 4 ghz (avg) performing way above expectations (100 th percentile) 90.8 %. Jura coffee machines reviews e8400 vs q9400 vs q6600 processor : Jura coffee machines reviews e8400 vs e8500 passmark burnintest / intel core2 duo e8500 vs e8400 : Core 2 quad q9400 2.66 ghz Compare products including processors, desktop boards, server produ...
7 Way Flat Trailer Plug - MICTUNING 4-Way Flat to 7-Way RV Round Blade Trailer ... / Check spelling or type a new query. . Check spelling or type a new query. 7 way flat trailer plug. We did not find results for: Maybe you would like to learn more about one of these? Maybe you would like to learn more about one of these? We did not find results for: Check spelling or type a new query. 7 way flat trailer plug. FAGINEY 7 Way Round to 4 Pin Flat Trailer Connector Light ... from i5.walmartimages.com Maybe you would like to learn more about one of these? 7 way flat trailer plug. We did not find results for: Check spelling or type a new query. Check spelling or type a new query. We did not find results for: Check spelling or type a new query. 7 way flat trailer plug. Maybe you would like to learn more about one of these? ...


Komentar
Posting Komentar